

🛡️ Managing Email Scanning with Microsoft Intune & Defender Antivirus
In this article, we’ll explore how to allow or block email scanning using Microsoft Intune policies — a crucial feature for protecting users against email-based threats such as phishing, malware, and malicious attachments.
Microsoft Intune, together with Microsoft Defender Antivirus, provides a centralized platform to manage security configurations across Windows and supported devices. One key setting in this context is Allow Email Scanning, which enables Defender to scan email messages and attachments for potential threats during any type of scan.
✳️ What Does Email Scanning Do?
When the Allow Email Scanning policy is enabled, Microsoft Defender Antivirus actively scans your mailbox data, including attachments and compressed files, to detect and block malicious content. It supports common email storage formats such as:
PST (Outlook)
DBX, MBX, and MIME (Outlook Express)
BinHex (Mac)
While effective with traditional desktop clients like Outlook, it’s important to note that this feature may not support modern, cloud-native email clients.
⚙️ What Are “Allowed Values” in the Intune Settings Catalog?
In Microsoft Intune’s Settings Catalog, Allowed Values define the possible configurations for a given setting. These values determine how a policy behaves once deployed to a device.
For the Allow Email Scanning setting, the allowed values are:
0 (Default): Not allowed – turns off email scanning
1: Allowed – enables email scanning
These values give administrators precise control over how Defender behaves when scanning devices for email-based threats.
🔧 Windows CSP Integration – Defender Antivirus
This policy is managed through the Windows Defender Configuration Service Provider (CSP), which provides a set of settings that can be deployed via MDM solutions like Microsoft Intune. The Defender CSP allows organizations to consistently enforce security policies and manage antivirus configurations across all managed devices.
By leveraging this CSP, administrators can ensure that Defender Antivirus aligns with corporate compliance requirements and protects endpoints from evolving threats.
This policy not only strengthens your organization's email security posture, but also ensures consistency across your managed environment.
🧭 In the next section, we’ll walk through how to configure this policy in Intune using the Settings Catalog, assign it to devices, and monitor deployment status.
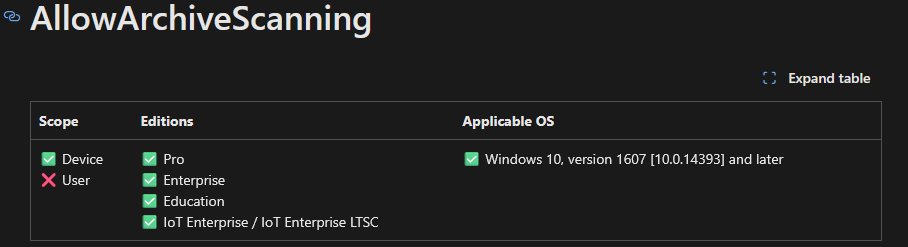
Description framework properties of the Allow Email Scanning policy are given below.


How to Allow or Block Email Scanning using Intune Policy
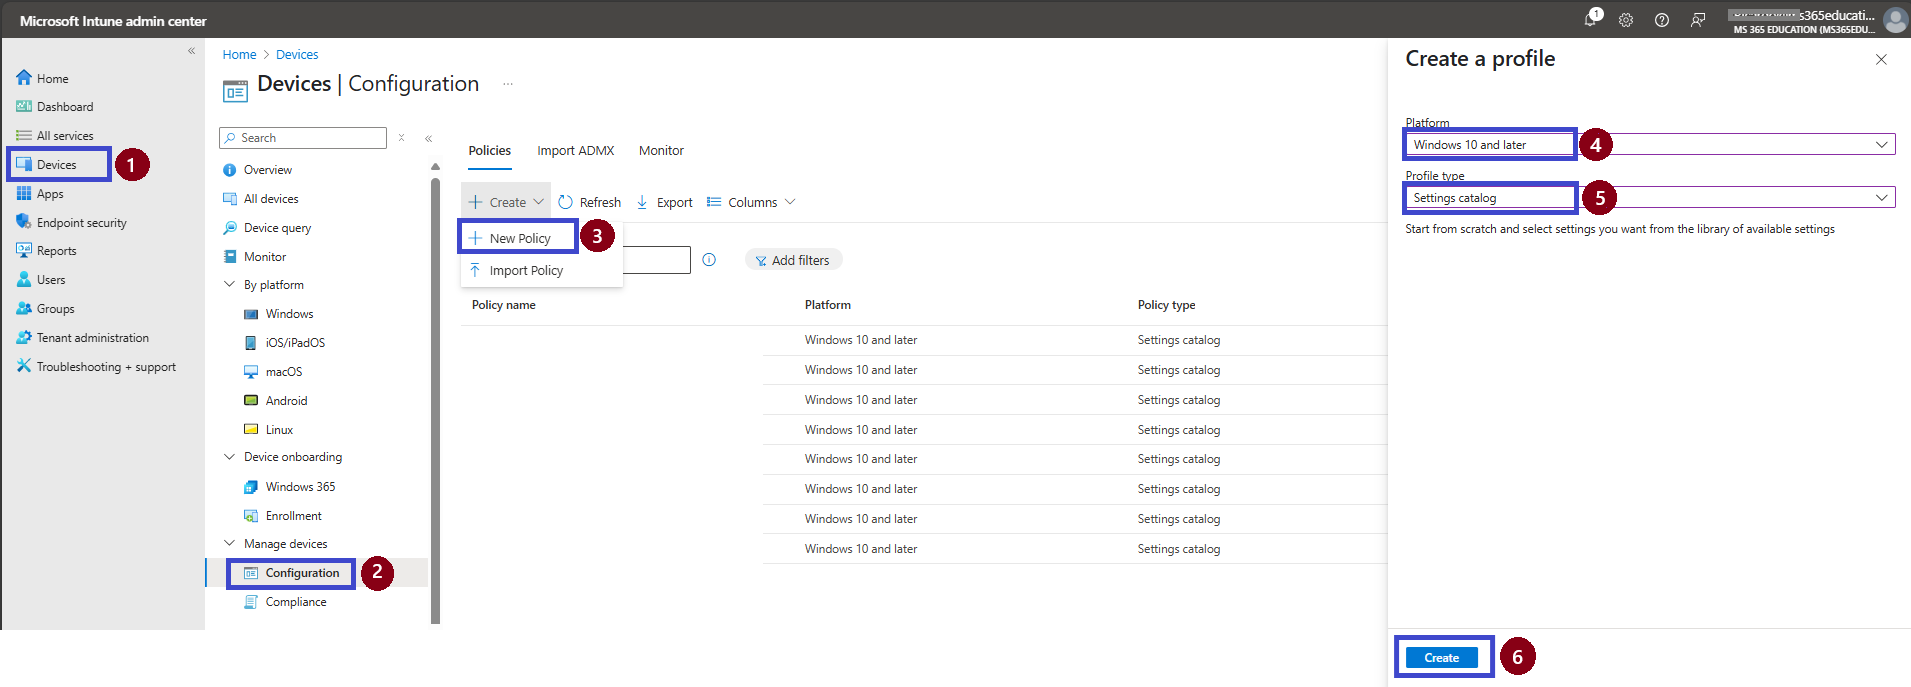
To enable or disable Allow Email Scanning, we first need to create a profile after signing in to the Microsoft Intune Admin Center. Open the Intune admin center and select Devices then Configurations. Click + Create on the right and pick New Policy.
Now, the Create a Profile page is displayed.
Select the Platform as Windows 10 and later.
Choose the Profile type as Settings Catalog.
Click the Create button to proceed.
📝 Basics
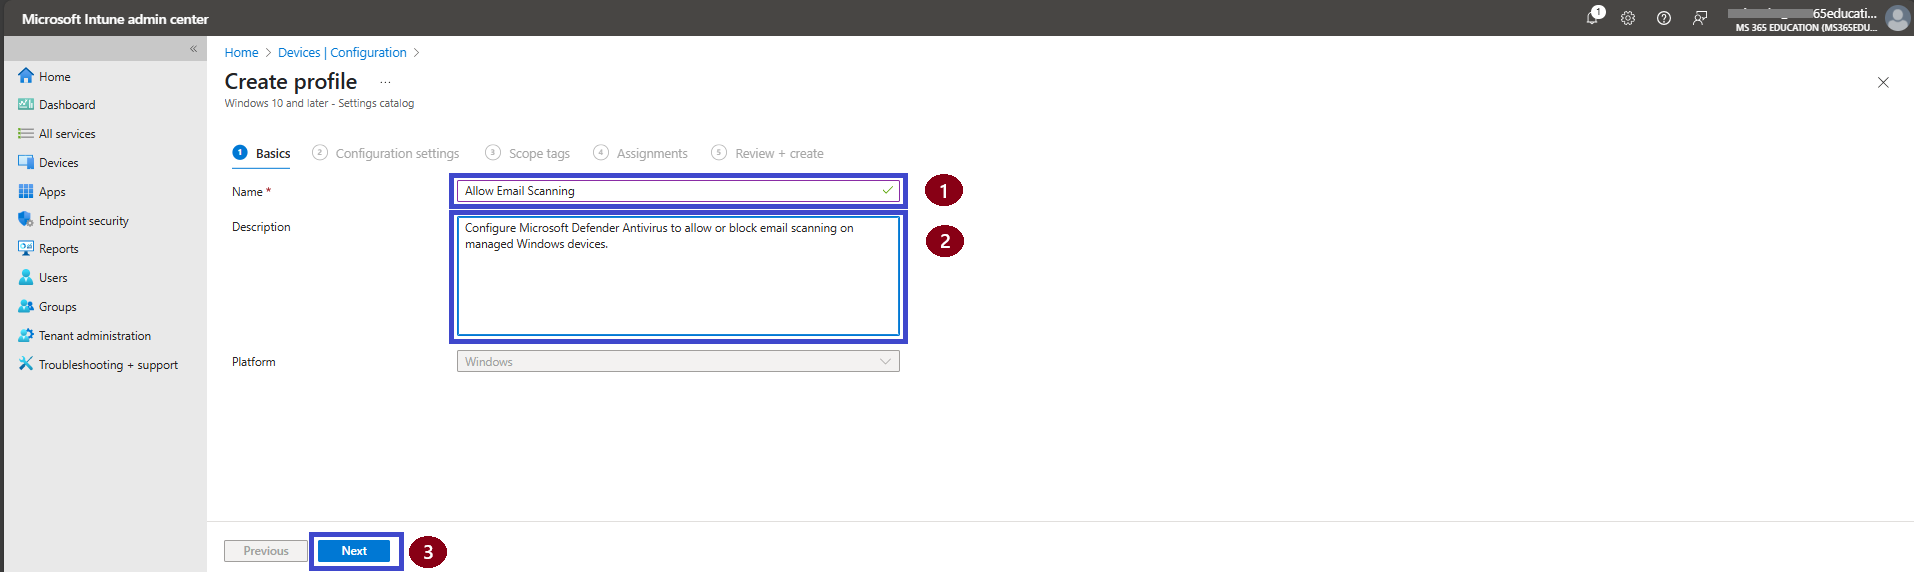
The Basics tab is the starting point for creating your configuration policy. Here, you'll provide essential details such as the policy name and an optional description to clarify its purpose.
Fill in the fields as follows:
Policy Name: Allow Email Scanning
Description (optional): Configure Microsoft Defender Antivirus to allow or block email scanning on managed Windows devices.
Platform: Windows 10 and later
Once the information is entered, click Next to proceed to the configuration settings.
⚙️ Configuration Settings
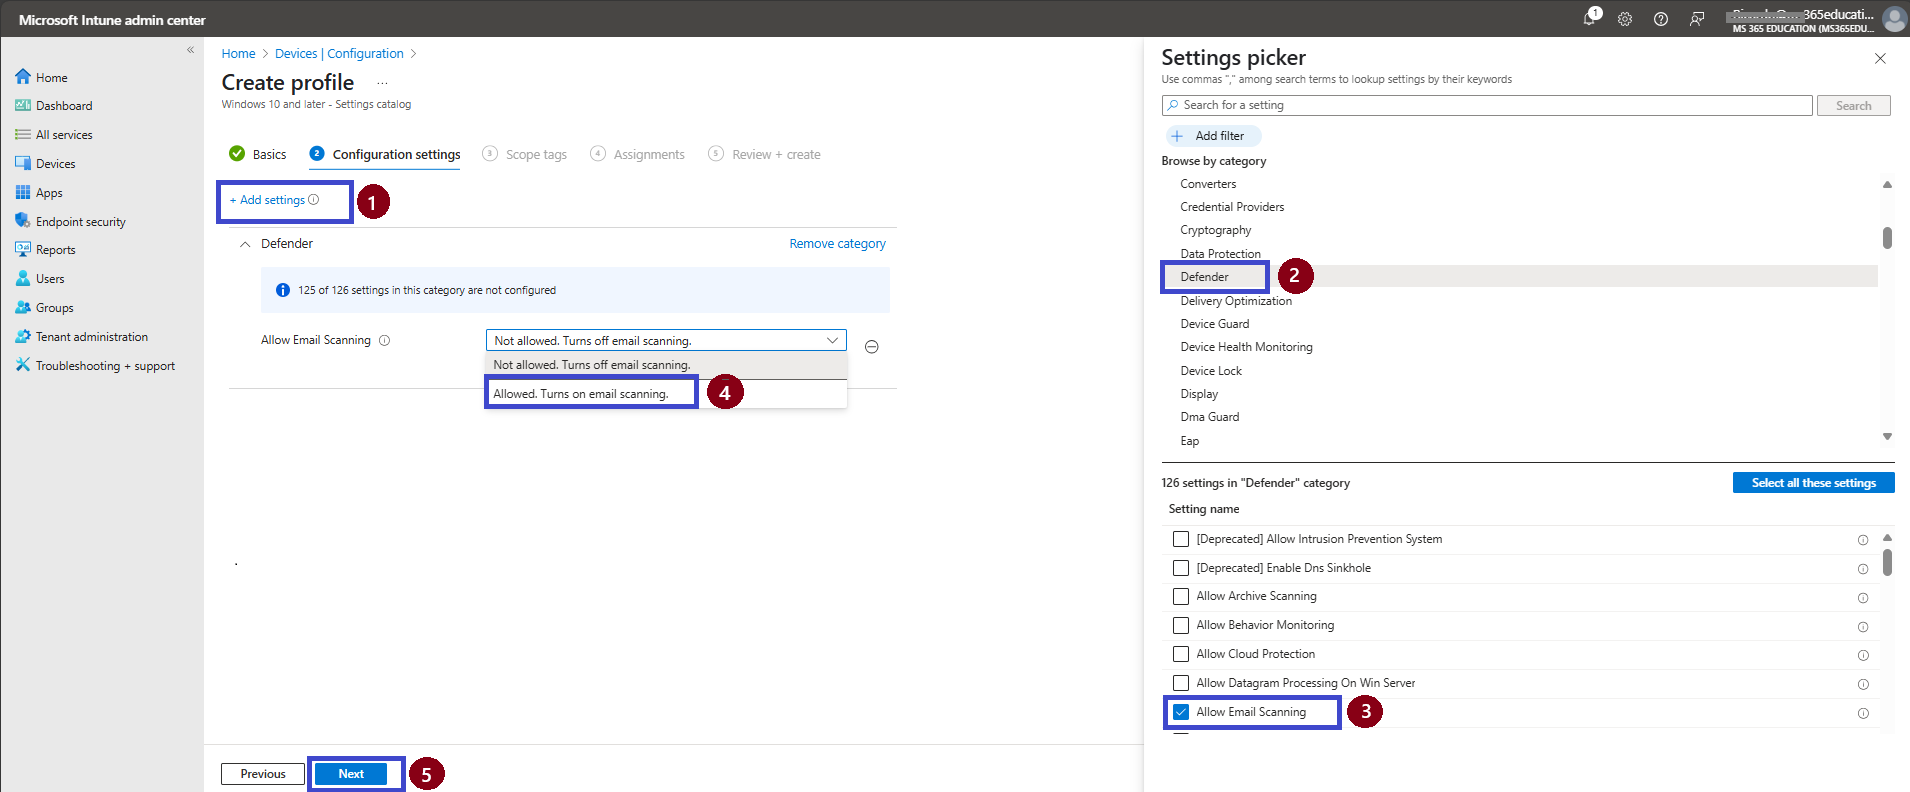
On the Configuration settings tab, you'll define the actual policy behavior.
Click + Add settings to open the Settings Picker.
In the list of available categories, expand Defender.
Locate and select the setting: Allow Email Scanning.
After closing the Settings Picker, the policy we chose will now be visible in the Configuration Settings. By default, the Allow Email Scanning setting is disabled (not allowed). If you’re satisfied with this, simply click the Create button to finalize it.
However, for this specific scenario, the goal is to enable email scanning. Therefore, from the drop-down menu associated with the Allow Email Scanning setting, I will select the Allowed (Turn on email scanning) option.
Click Next to move on.
Scope Tags
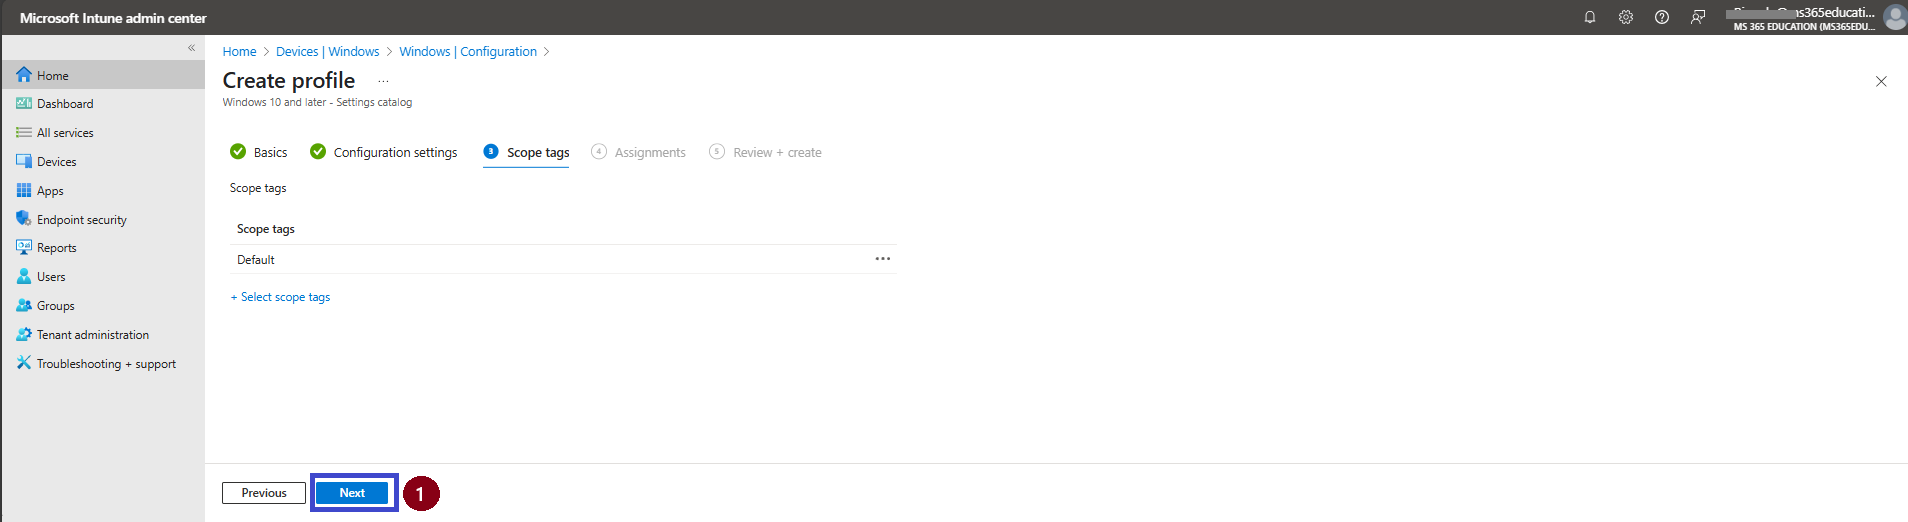
Scope tags allow us to apply this policy to specific groups of users or devices. This step is optional, so we can easily skip it if we don’t need it. In this case, I’ll skip this section and click the Create button.
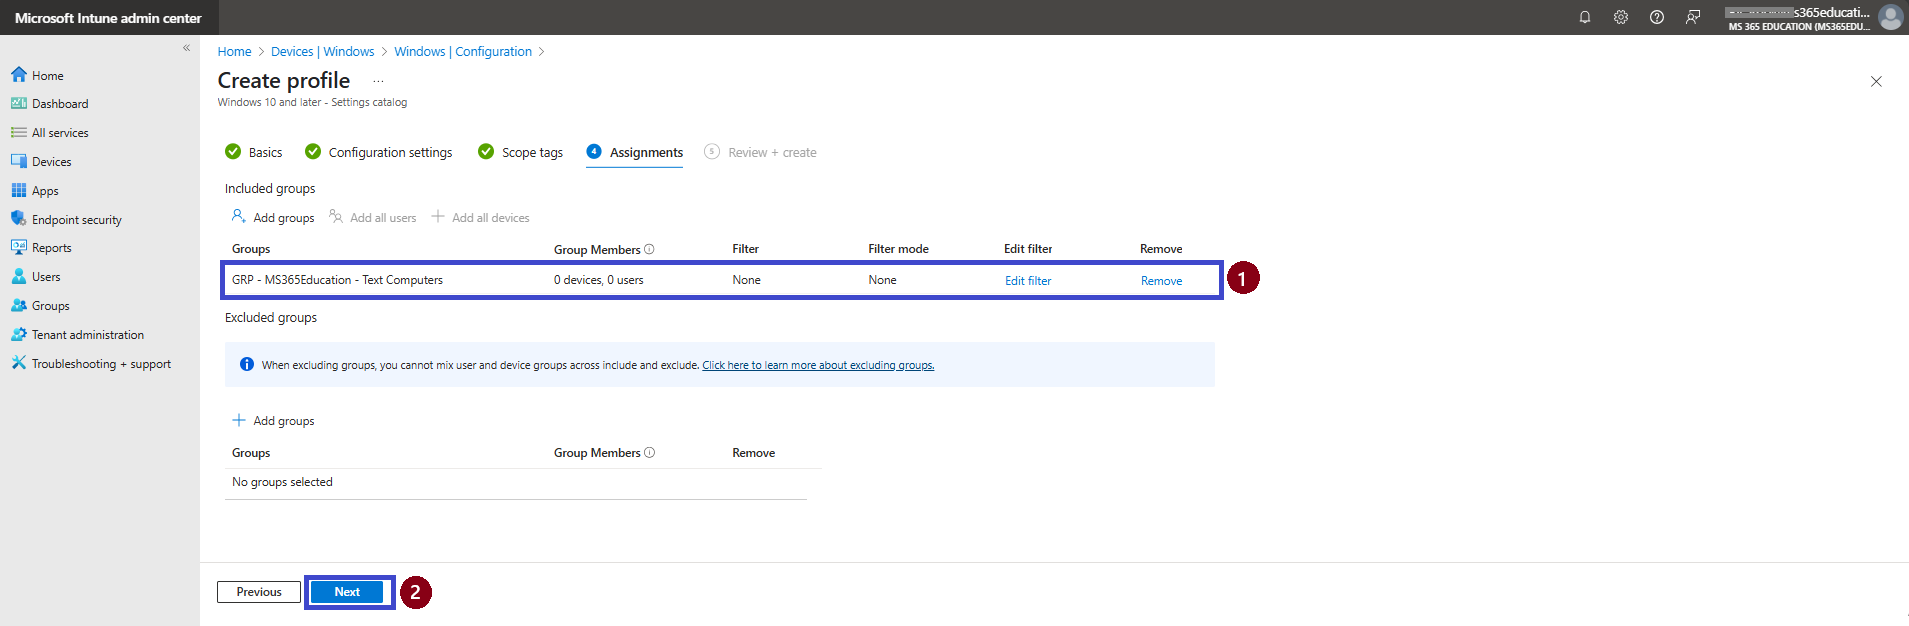
On the Assignments page, assign the configuration profile to the appropriate device group.
Click on Add Groups under the Included Groups section, then select: “GRP - MS365Education - Test Computers”
In this example, no filters are applied, and the Excluded Groups section remains blank.
Click Next to continue.
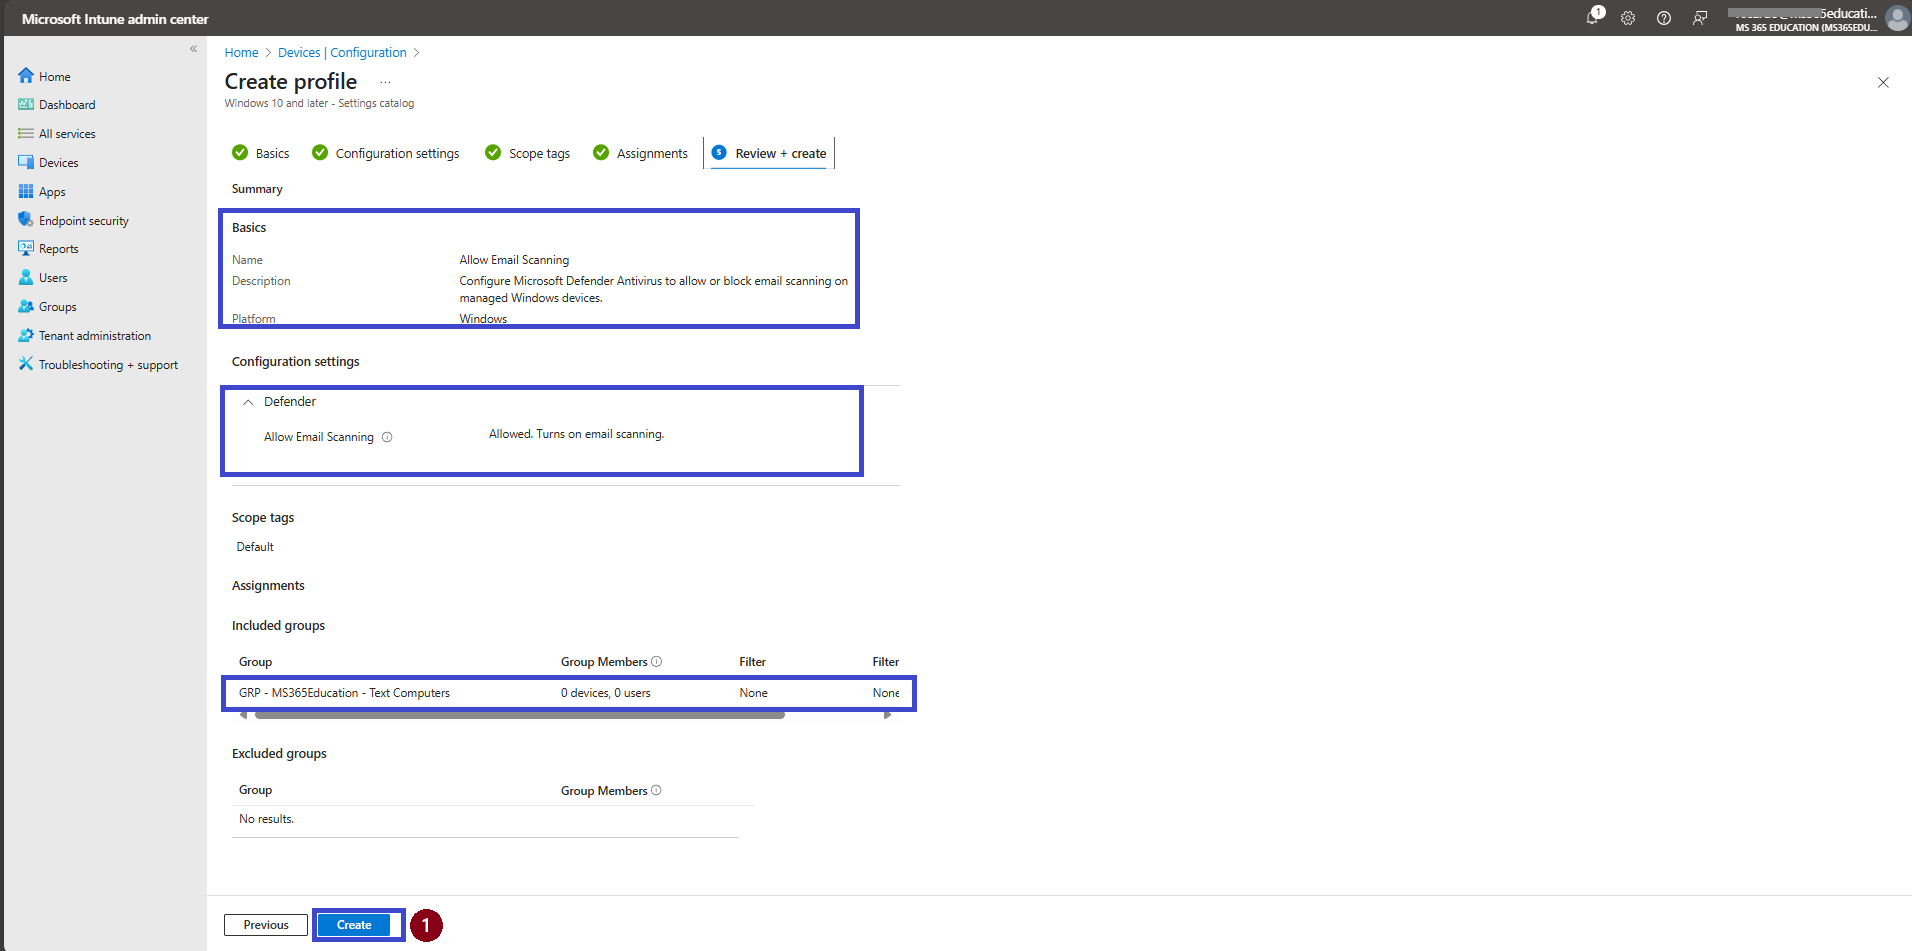
Review + Create
On this final Review + Create page, we can see the summary of the policy details which we are given in the previous steps. Double-check all the details of the policy and if everything looks correct, click the Create button.
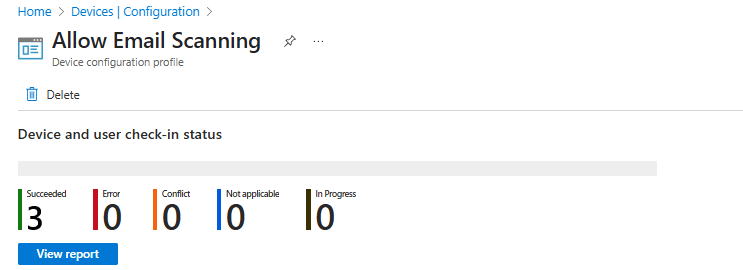
Monitoring Status
Once click Create, we will get a confirmation that the policy was created successfully. For quicker deployment, we can manually sync the device in the Company Portal. Afterwards, we can track the deployment status in the Company Portal’s monitoring section. In this case, the Status shows succeeded (3).
🖥️ Client-Side Verification – Email Scanning Policy
Once the Allow Email Scanning policy is deployed, it becomes active after the next successful sync between the device and Microsoft Intune. Although there is no direct visual indication for end users, the policy operates in the background, scanning supported email files and attachments during antivirus scans.
🔍 Verification via Event Viewer
The MDM Policy Manager applies the Allow Email Scanning policy under the Defender category. Key parameters such as Enrollment ID, Int Value, Enrollment Type, and Scope may vary depending on the device configuration and the method of assignment.
Example Event Log Output (may vary by device): MDM PolicyManager: Set policy int, Policy: (AllowEmailScanning), Area: (Defender), EnrollmentID requesting merge: (B1E9301C-8666-412A-BA2F-3BF8A55BFA62), Current User: (Device), Int: (0x1), Enrollment Type: (0x6), Scope: (0x0)
Parameter Breakdown:
Enrollment ID: A unique identifier for the device’s MDM enrollment (e.g., B1E9301C-8666-412A-BA2F-3BF8A55BFA62)
Int Value: Indicates the applied policy’s state — e.g., 0x1 means email scanning is enabled, 0x0 means it’s disabled
Enrollment Type: Shows how the device is enrolled (e.g., 0x6 = MDM-managed)
Scope: Defines the scope of the policy (e.g., 0x0 = device-level)
🛠️ How to Verify on the Client:
Open Event Viewer on the Windows device.
Navigate to: Applications and Services Logs > Microsoft > Windows > DeviceManagement-Enterprise-Diagnostics-Provider > Admin
Look for entries such as Event ID 814, which commonly indicates successful policy application.
Review the event details to confirm that the policy "AllowEmailScanning" appears with the correct Int value.
⚠️ Troubleshooting Tips:
Ensure the device has recently synced with Intune.
Verify group assignments in the Intune Admin Center.
Check for potential conflicts with other applied policies.
Consult the official Microsoft Defender CSP documentation for advanced log interpretation.
📚 More Information
To deepen your understanding of configuring and managing the Allow Email Scanning policy in Microsoft Intune, refer to the following official Microsoft resources:
Configure Microsoft Defender Antivirus using Microsoft Intune
Microsoft Defender Antivirus settings for Windows devices in Intune
Microsoft Defender for Endpoint security baseline settings reference
These resources provide detailed guidance for configuring, deploying, and verifying email scanning and related security policies across managed devices using Microsoft Intune.
Thank you!
🖥️ Ricardo Barbosa
📘 MCT Microsoft Certified Trainer | ☁️ Cloud Architect
🌐 Technology Director - https://altelix.com